There may be a lot of you film buffs out there who are already up-to-speed on classic German films like "Metropolis", "The Blue Angel" and "The Cabinet of Dr. Caligari". But I think I've got one up on you. I may not be a film expert, but I just got a whole lot smarter about "the business" - film in general, that is, and German film in particular - after having visited The Berlin Film Museum.
It's a museum that is certainly easy enough to find. Everyone who comes to Berlin stops by to visit the beautiful circular courtyard of the Sony Center. And that's where you'll find this sleek futuristic complex, generously spread out throughout three floors of this great, spacious structure. Designed by celebrity architect Helmut Jahn, The Berlin Film Museum guides you through 100 years of film history, with a focus on that golden era when films made in Berlin came close to challenging those of Hollywood.
The "Permanent Exhibition" is essentially a condensed journey through German film history. Beginning in the early "Metropolis"-years of silent films, it takes you on to the "Blue Angel"-period of the Weimar Republic years and beyond. The "Transatlantic" section is particularly interesting. During the 1920s, many of Europe's filmmakers and stars went to Hollywood to do American versions of the films produced here (most of which failed miserably). Propaganda film under National Socialism is then covered, of course, as are the individual famous exiles of Hollywood who managed to escape the Nazi terror. Post-war cinema and contemporary film are explored in great detail, but the heart of the exhibition remains, understandably, the Marlene Dietrich Collection.
Marlene Dietrich, born and buried in Berlin, is without a doubt Germany's most famous film icon and accordingly, three entire rooms highlight the Marlene Dietrich Collection here. There are a total of 130 items on display, among them her screen and show costumes, several portraits and vintage prints, personal accessories and other small items - though there are also quite a few larger items, too, like the eight enormous metal cases that held her luggage! Several small clips from her films can also be seen here, among them some famous footage of her speaking out against Nazism and angering her home country. There are also several home movie clips of interest.
The "Retrospective" is the Film Museum's other large exhibition area and always worth visiting. Just bring a lot of time with you when you come. It changes on a regular basis, of course and has already managed to put a wide area of fascinating individuals and subjects under its belt, a few examples among them being: Billy Wilder, Erich von Stroheim, Fritz Lang, F. W. Murnau, European 60s, New Hollywood, Cold War, Exile and Artificial Humans.
Interestingly enough, the Berlin Film Museum also offers its visitors a large public library. Berlin university students and professors, historians and film researchers and just "plain old" interested individuals can take advantage of a large selection of modern and historical documentation. Many publications on film history are available, as are books about the history of photography, film theory, film genres and aesthetics. There are also screenplays, books on scriptwriting, biographies and memoirs to be found.
And in the coming spring of 2006, the first German museum for television will open here. It will highlight the many stars of the medium, investigate broadcasting technology and politics and will play its role in the preservation of German television history. And one special event is already being eagerly awaited: The celebration of the FIFA World Cup, world soccer's great sporting event which will be held in Germany next year. This will be the Television Museum's first exhibition and is scheduled for May.
I have ended up spending much more time at the Film Museum than had I planned to - every time that I come here. Although, I must say, I always leave the place thinking that I should have stayed a little longer. So film buff or not, come by for a visit and you too can get a lot smarter about German film history.
Berlin Film Museum
Potsdamer Strasse 2
10785 Berlin-Tiergarten
Tel: +49 (30) 300-9030
www.filmmuseum-berlin.de
Wednesday, March 16, 2011
Visiting the Berlin Film Museum
Stephanie Harrison Photography - Where You'll Find the Best Photographer in Town
Whether you're looking for that perfect photographer for senior pictures, wedding photos, new baby celebration or special family moments, Stephanie Harrison Photography is the place to go! You'll not only find a professional studio that is conveniently located in the heart of the Historic Depot District in Richmond, Indiana, but you'll meet one of the friendliest, easy going photographers around; not to mention at a great value!
The photographer at Stephanie Harrison Photographer, none other than Stephanie Harrison herself, offers an artistic style that can't be found elsewhere. The results of her work give an eclectic, non-staged, and real feeling. She captures expressions and movements perfectly in her photographs. She's got the perfect personality for children and adults alike. She can accommodate any situation from serious, quiet moments to doing whatever is needed to get an unsure baby to smile, make nervous folks feel comfortable or even catch that wondering gaze of a beloved pet.
Photos aren't always taken inside the studio at Stephanie Harrison Photography. The opportunity is also there to go outdoors and use the resources of the Historic Depot for a more urban look, combining the exposed brick of old buildings with the sweet, fresh face of a new baby, for example. Stephanie is also often available for on-site shoots for weddings, special celebrations and other purposes!
Stephanie Harrison has the experience to make your photo shoot the best it can be! She's been featured in a number of magazines across the world and has won various photography awards. With such skill and recognition one might think her prices would reflect it, but at Stephanie Harrison Photography, the value is unreal!
The session fee is a very reasonable $40.00 for up to four people. Prices for prints obviously vary by size but range anywhere from $8.00 for eight wallets up to $90.00 for a huge 20x30 print! She offers packages for senior pictures starting at a low $99.00 and Wedding Packages that can be had from $550.00. Also available are Gallery Canvas Wraps in various sizes which are, simply put, awesome!
Stephanie Harrison Photography can be found at 195 Fort Wayne Avenue in Richmond, Indiana and reached at (765)962-3133. The website, www.stephanieharrisonphotography.com offers numerous examples of Stephanie's work, a price sheet, bio, and contact information for setting up your first session.
Stephanie Harrison Photography; you simply won't find a better photographer around!
The Art and Science of Teaching

source
Some educators view teaching as primarily an art. Others take an opposite point of view and consider teaching to be strictly a science. Many educators believe that effective teaching is a combination of both art and a science. A teacher gains knowledge both, of teaching methods and subject matter throughout his or her career. The art of teaching lies within the application of knowledge gained from research, taking place in the context of the unique, situational nature of the classroom. One cannot truly become an effective teacher without integrating both the art and the science of teaching.
Teaching as Art: Understanding Through Definition
Webster's II New Riverside Dictionary gives several definitions, which can be used to support the idea of teaching as an art. The definitions include but are not limited to: (1) "the activity of using imagination and skill to create beautiful things (Webber,1984, p.41)", (2) "a field or category of artistic activity (1984, p.41)", (3) "a trade or craft and the methods employed in it (1984, p.41)".
Teaching As an Artistic Process Achieving an End Product
Teaching involves imagination and skill in creating student learning. This refers to the activities in which teachers engage each day, utilizing both imagination and skill, and one might add intuition. Teachers engage in such activities to bring about the product which is student learning. It is interesting to note that the product in this case is also by definition, a process.
The classroom environment, for example, can be broken down into 2 components: (1) physical design, and (2) social-emotional climate. The classroom learning environment can be considered a work of art in and of itself. Without a proper environment, both physical and emotional, students will not be able to learn effectively. The physical environment can be relatively easy to maintain, but the emotional climate for learning requires the artful application of imagination, skill, and intuition on the part of the teacher.
Some aspects of the emotional climate of the classroom can be pre-planned, but most of the work involved in the maintenance of a proper social-emotional climate for learning, is done in the moment. In Maintaining a positive learning climate, the teacher must take into account the endless supply of variables that may appear without warning, in the milieu. Keeping the classroom and the students organized and on task, while teaching the required skills and concepts, and the whole time fostering an atmosphere of respect, caring, and responsibility, describes the artistic process by which teachers conduct business. The product of this artistic process is a class of students who respect and care for one another, in the process of effectively learning subject matter.
Teaching is a Category of Artistic Activity
Teaching is indeed a category of artistic activity. In an interview on pedagogy, teacher Camille Paglia describes her teaching style as "improv", and relates it directly to performance art (Rodden, 1996). She refuses to accept someone reading a prewritten lecture as teaching (Rodden, 1996). Madeline Hunter describes teaching as a dynamic activity, and finds it important to see each teaching situation as unique due to the interplay of many variables (Magestro, 1994). The art of teaching involves not only knowing what to do and how to do it, but also knowing when to do it, and in what situations not to do it (Magestro, 1994). It is this kind of thinking process that takes teaching from a scientific base to an art form (Magestro, 1994).
Teaching as a Trade and a Craft
It is obvious to most that teaching is both a trade and a craft, and therefore by definition, the method by which teachers practice their trade, is an artistic process. Those who argue teaching to be purely a science cannot properly argue against this definition. In defining art in such a manner, one can easily see that it is the application of the science that constitutes the art. Teachers apply a body of knowledge regarding what is known about teaching and education, as well as subject matter. The art of teaching consists of decision making in the moment, building a repertoire of techniques and skills, and knowing when to draw upon which techniques, that make up the art of teaching. Some consider this an extreme form of multi-tasking, a challenge even to ex-soldiers, as described by Brougham (Inspiring Words, 2003).
Teaching as Science: Using definitions to Gain Perspective
Webster's II New Riverside Dictionary defines "science" as (1) "the study and theoretical explanation of natural phenomena (Webber, 1984, p.620)", (2) "a systematic activity requiring study and method (1984, p.620)", and (3) "knowledge, especially that acquired through experience (1984, p.620)".
Teaching as the Study and Explanation of Learning
Broadly speaking, education can be defined as the study and theoretical explanation of teaching and learning. Educational research, along with research from several other fields, provides the basis for our understanding of educational methods (Ivie, Roebuck, and Short, 2001). Educational research is a component of education, not a separate field, as may be commonly assumed. Educational research is an important part of what teachers do in the classroom on a daily basis. Teaching as a profession, as described by Madeline Hunter, is based in the "science of learning" (Ivie et al., 2001). Teachers utilize the knowledge gained from research findings in the classroom each day. Educators sometimes even take part in educational research, conducting action research within their own classrooms.
Teaching as a Systematic Process
Teaching is systematic, and it requires much study before entering the profession, and throughout one's career. The results of experiments done by B.F. Skinner in the 1960's were found to be applicable in the classroom setting (Ivie et al., 2001). Many principles of behaviorism are utilized in classrooms today, especially with students with special needs. Students with certain presentations often respond well to behaviorally based programs, in which they are rewarded for positive or desired behaviors in an attempt to extinguish negative or unwanted behaviors. Behavioral techniques often provide some benefit to the general student population as well.
There are some that view the use of technology in education, as an aid in systematizing teaching (Ivie et al., 2001). Author Seymour Papert, who writes on children and technology, states that the use of technology and computerized learning will someday allow us to so modify a child's learning environment to point of not needing schools (Ivie et al.)! Such an idea may seem a little strange to the educators of today. However, Papert may be on to something. Computerized technology may be of great help in systematizing aspects the educational system, or at least in terms of the teaching and learning of isolated skills in the classroom.
Education as a Body of Knowledge
Madeline Hunter has described teaching as an applied science based on research on learning and behavior (Ivie et al., 2001). The body of knowledge that makes up what we know about education, broadly speaking, defines education as a science by definition. Hunter has noted that education as a field takes into account knowledge based on research from several other fields including: psychology, neurology, and sociology (Ivie et al.),
On an individual level, the teacher has also developed his or her own specific fund of knowledge, integrating information from other sources as well. A teacher builds a repertoire of teaching and subject matter knowledge over the course of his or her career. The acquisition of knowledge begins in college, or maybe even before. It does not, however, end with formal higher education. Not only is professional development mandated by state and federal agencies, teachers are also involved in continual reflection, and are by design, always trying to improve their teaching methods. Improvement is made possible only through the continual accumulation of knowledge. This accumulation of information and improvement of teaching practices based on information gained from speaks to the science of teaching.
Some people view teaching as an art, others consider teaching to be a science. It is important to note however, that those who truly understand the process of teaching can appreciate the interrelated and synergistic combination known as the art and science of teaching. The art of teaching i.e., the creative processes, the skills, and the teaching craft, is found in the application of the science of education: the systematic processes, the body of knowledge gained from several disciplines. A teacher needs to utilize both the art and the science of teaching to create effective student learning
References
Brougham, H. (2003). Inspiring words for educators. Curriculum Review. 42(9), 8.
Ivie, S.D., Roebuck, F., & Short, R. (2001). Experienced teachers insist that effective teaching is primarily a science. Education, 121(3) 359-35.
Magestro, P. (1994). Tribute to Madeline Hunter. Educational Leadership, 51(7) 83.
Rodden, John. (1996). A TPQ interview ‘improv' is my pedagogical style: Camille Paglia on teaching as performance art. Text and Performance Quarterly, 16(2), 161-171.
Webber, H. (Ed.). (1984). Webster's II new Riverside dictionary (Berkley ed.). New York: Houghton Mifflin.
Sunday, February 27, 2011
Using Depth of Field for Photography
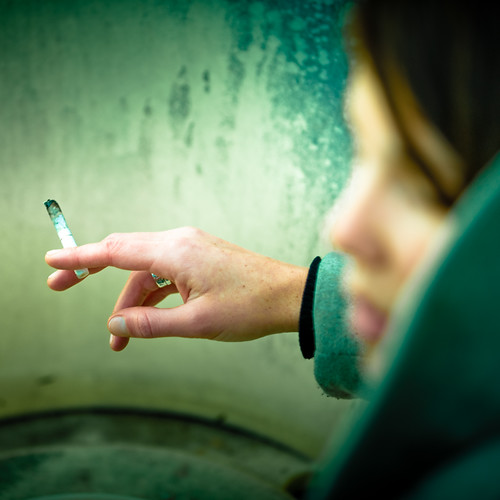
Photo Credit: celtics baby clothes
It's one of the greatest tools available to photographers, it's easy to use, and yet it's among the least known and used abilities of a camera today. Pro photographers have used it for decades, but the amateur can use these same techniques without paying the professional price. It's called depth of field, and it's accessed through the use of the aperture.
The aperture, simply put, is the hole that light comes through in your camera. Light passes through the front of the lens, through a series of glass pieces, through a hole at the back of the lens, and into the camera. The aperture is the hole in the back of the lens, and you get to control this vital part of the camera, if you decide to want to bump up your pictures. You can place the camera on auto, and the camera will adjust its aperture, shutter and more to the situation it sees. By placing the camera in more manual modes, you take on powerful and personal control, and YOU get to decide what you want to create with your photographs.
An important factor here is lighting. Any photography relies heavily on the lighting that you are using, whether it be from the natural, ambient light around you, or artificial light, like a strobe or other flash unit. Especially while using natural light, it will be important to use a tripod to keep the camera steady while shooting. If you are shooting on a cloudy day, without much light, then the camera must compensate for less light by having a longer shutter speed, which it will do automatically in the mode I'll be explaining in a moment. A longer shutter speed means the camera won't be able to have a clearly focused picture without the use of the tripod.
Depth of field simply means the area of focus, or the area in the picture that is in focus might be a more accurate term. Photography is a two dimensional medium, having height and width, but it lacks depth, the third dimension. Your photography can create the illusion of that depth through a few easy camera settings. You may be asking yourself, why would I want to create the illusion of depth, and what is it good for? Part of the reason is to create a sense of emphasis. When you take a picture of a large area, with trees, birds, squirrels, people, rocks, etc, what is the thing or object that you are zeroing in on? Is there anything that you really want to emphasize to your viewer? If so, it's probably getting lost in the crowd of other things on the scene. The squirrels are so small you can barely see them, the people are walking their dogs, and the trees are swaying in the breeze. But what if you wanted to focus on the viewer on the flowers in the garden? When you create emphasis on an object, it strengthens your photo, and actually guides the eye of the viewer to that object. You could take pictures to create a story about that, as you can read in my article about photo stories. When you get in to take close-ups of the flowers is where the possibilities of great photography begin.
Emphasize the garden by focusing in on one or two flowers at a time. Grab a tripod, get down to eye level with them, and then get ready. Place your camera in a mode that allows you to change your aperture; the mode is usually called "A", or "AV" on some models. Film cameras can allow these changes too, on SLR models. They require you to simply change the f-stop manually on the aperture ring. On your digital camera, use your selector buttons to change your aperture. You'll see on your digital camera, most likely, a letter f, with the number on the readout on either the monitor, or the info panel on the top of the camera, or perhaps both areas. The f means f-stop, which is the name commonly used to describe the number of the aperture setting. The best way to emphasize a flower is to have only that flower in focus, and to have the rest out of focus. Change your aperture to a really low number, such as 2.8, 4, or 5.6. When the lens is at a low number like this, the lens hole is wide open, but it is creating a small area or depth of field; basically an inch or two will be in focus. Focus your camera, and shoot. Now, look at the camera, and look at your pictures. The one or two flowers should be in focus, but do you see how the background is fuzzy and out of focus? This is what is called a "shallow depth of field", and that comes from using a small number f-stop. That's because you've taken control of your camera, and changed the outcome! Because only the flower is in focus, and the rest is blurred out, you have guided your viewer to what YOU want to emphasize! You have used one of the most powerful tools available for a photographer to bring a new focus to your pictures. Try this with a lot of different scenes; look how the item is forced to really stand out for you because it's the only thing in focus.
Now, on the opposite end of the spectrum are the pictures that have the entire photograph in focus; such as a lighthouse standing out from the beach, with horseshoe crab shells in the immediate foreground. This is also done by changing the depth of field of your camera. Here, you again change your aperture, but this time place it on a high number like 16, 22, 28, etc. This is to create a large depth of field by using a small hole in the back of the lens. Again, you must use a tripod to keep the camera steady. Take a picture with something in the near foreground, such as a rock or the crab shells, and then compose your picture with a mountain or some other object some distance away, focus, and shoot. Remember to use the rule of thirds here for additional emphasis. As you'll see, both areas should be in focus, again showing the third dimension and creating the illusion of depth. This is a large depth of field.
It's a little known tool in the photographer's toolbox, but almost any camera made in the past four years will have some sort of ability to work with depth of field, whether they have a point and shoot or DSLR. Every photographer, of every level, has the ability, through practice, to create beautiful photographs that can rival those of the pros, by using the tools available with every camera. Use the strength of depth of field when you create the third dimension in your photographs, and add a new and incredibly
powerful personal dimension to your photography.
Photography Tips and Tricks

photo source
Photography isn't just about making memories, it's about art. Be artistic. Here are a few tips and tricks to help you make those photos, picture perfect.
To make those dull photos turn into works of art, consider these questions:
Decide if you want the full subject, half, or even a close up. How much background do you want, or even foreground? Exactly how close do you want that close up? What details do you want to focus on? Do you want a vertical, horizontal, or tilted photograph? What angle do you want? What's the best lighting? What background do you want to use?
1. Placing the subject of interest. Choose how much of the subject you want photographed. (Example: you want full body, half body, or face shot.) If your subject fills the frame then it's okay to center it. If you are trying to get more of the background, try placing your subject to the right or left in the viewfinder. With a horizontal (laying down), try to place them at the top for more foreground, or at the bottom for more background. And you could even tilt the camera for a more funky picture. It all depends on what part of the scenery you want visible in the picture. Maybe you want that tree to your left and your subject to the right. Or the patch of flowers in front and the mountains in back. (I find it best to take my time and take shots of each possible way and several different poses. This way I know I'll find the best photograph with the most potential.)
2. Don't center. The circle, plus sign, or brackets in the middle of your viewfinder is for focusing and isn't necessarily for centering the subject. Placing your subject in t he circle could leave you with a lot of empty and useless space on your photograph. Too much background and not enough subject. If your subject fills the frame then it is okay to center them. (Sometimes you just have to ignore the focus points and concentrate on your subjects placement in the frame instead.)
3. Camera angles. Walk around the subject, shoot from all angles and sides. This will help you to get the best lighting, background, and different aspects of the subject. You will want to find the best angle for all three. Pick a background that will not distract your viewers from the subject of interest. (I choose my backgrounds to where there's not much clutter. Sometimes I will use a plain sheet or blanket and place it behind the subject, but making sure it does not clash or blend.)
4. Reflectors. In some situations you just can't get enough light or you perhaps you just want more. To use a light reflector, place it in a position where it reflects light onto the subject without it getting in the frame. Use this if your shot is coming out too dark or there are too many shadows. On night shots that you need more than your flash can put out, place a lamp (or several) near your subject, but out of sight, and use the light reflectors to bounce from the lamps to where needed. (Some homemade light reflectors can be real cheap to make. You could use white cardboard, or if you can't find this, then simply take any piece and paint it white. For more light, place tin foil over your piece of cardboard, smooth it out, and reflect where needed.)
5. Shading. Using the same piece of cardboard as mentioned above, you can use this to block the light as well. You could make this easier by painting one side white and the other black. Or just place the piece in front of the lamp or sun to dismiss light from your subject. On most cameras you can use a sunshade for the lens, some cameras come with this, some you buy separate. This won't keep light from your subject, but it will block the light from causing a flare effect on the outcome of your photograph. The sunshade just clicks into place around your lens, and keeps the lens safe from any glaring.
6. Outside daylight. Direct sunlight is when you place the sun behind the camera, but in front of the subject. Using direct sunlight can cause shadows on the subjects face and possibly their eyes squinting. Back light is when the sun is behind the subject and in front of the camera. This will lighten the photo and cause much softer features on the subject.
7. Preventing red eye. Red eye is caused when the flash is too close to the lens. Ways to prevent this are: Attach a larger flash to your camera, t his way the flash is further from the lens. Or if buying a camera, look for one with the flash located far from the lens. Try getting closer to your subject when needing the flash. (Before I bought my camera with built in red eye correction, I had to use a photo editing program to correct these problems. I was even scanning my pictures and still having to edit when I was using my film camera that was hopeless against red eye.)
Saturday, February 26, 2011
Photographer Interview: Break into Concert Photography

credit,credit
Anthony Siciliano of Ramsey, NJ, was initially attracted to photography through some playful competition with his friends. Even when he realized his friends had no idea how to use their cameras, he stuck with it and earned recognition in photography and videography.
As a photojournalist and concert photographer his experience is transferring into his newest venture as part of Awesome Farm - a video production and photography business formed with his friends. At least with the friends that know how to use a camera.
Siciliano answered a few questions and gave some advice for fellow photographers looking to break in to photography, specifically concert photography and photojournalism.
What was your first camera?
My first DSLR was a Nikon D80 with the 18-70 mm lens. However, the first point-and-shoot that I bought for myself was a Pentax Optio S-40, which I still have. I really enjoyed taking pictures of flowers, but I was dissatisfied with the performance and results of my point-and-shoot (particularly, the shutter lag). I looked into DSLRs, and ended up purchasing the D80. Thousands of dollars, and much gear later, here I am.
What photographers - well known or unknown - inspire you?
I really have fun with concert photography, live shows where I bring back photos that give you a good sense of what happened during an event. A photographer that does this very well is Todd Owyoung. His website is http://ishootshows.com/. Not only does he get awesome results, but also he shares his wealth of knowledge with everyone, which I respect immensely.
Check out the Strobist blog as well. It features off-camera lighting and lots of DIY equipment at http://strobist.blogspot.com/.
Is there a certain piece of gear you could not live without?
I do not skimp on my gear, and it has definitely paid off. In my opinion, it is better to save up for a longer time and get better equipment, than it is to spend early on something else. Unfortunately, I am addicted to buying new things, which can get very expensive. I could not live without any of this stuff, but if I had to pick one lens, the one that does most of my work is the 18-70mm lens.
Do you have any goals in mind with your photography?
I hope that I will be shooting famous bands very soon. A lot of doing that is getting to know the people who run the events, and the people who manage the bands. So far, the most famous people I have photographed in concert are Kate Voegele, Jack's Mannequin and the rest have been local bands. Currently, I shoot for local newspapers. The pay is not very good, but it is fun and better than nothing at all. Doing this will help me get exposure.
What advice would you give to someone who wants to shoot concerts?
The gear that is best for concert photography, at least in my opinion, is fast lenses and cameras with high ISO abilities. It is deceptively dark inside most music venues. My 50 mm lens does a lot of work there, with its extremely fast 1.8 aperture. My other lenses that go down to aperture 2.8 are extremely important. Large wide-open apertures are important for catching performers in action, without blur. Someone that wants to shoot concerts should definitely invest in a 50 mm lens, and save up to buy other fast lenses. Many places do not allow flash during performances, and your brand-new flash unit will not do any good when security tackles you. Also, watch out for drunken people and mosh pits at shows, which is a good way to wreck your camera.
How did you get a job with your local newspaper? What skills does that require?
When I was doing physical therapy for my tendinitis, I met a photographer who was shooting some photos for a brochure. We got to talking, and she gave me the contact info of a local photo editor. The skill involved in photojournalism is the same most other photographers use, except more irritating. Not only do you have to capture good pictures, but also you have to do it consistently, and make sure you get people's first and last names. If you do not get their names, editors will not use your photos. That can be a big disappointment, after all your hard work. You also have to be versatile and ready for anything. Get to events early and scope things out. that is the best advice I can give. Coming in late and not getting a good spot makes things a lot more difficult.
What advice would you give new photographers?
The best way to learn photography is by doing. When I bought my camera, I barely knew how to use the thing. One great thing I think everyone should do is a Project 365. That is where you take one photo per day (at least) and write a little bit about it on your Flickr account or a photo blog. It will help you learn to shoot in all current situations as well as on days or times where you think a camera might not be convenient to have. Then, at the end of the year, you look back and see how much you have improved, as well as your year in a series of photos. Also, do not forget to take a break when you are post-processing your images. I got a bad case of tendinitis from using the computer too much, and it really puts a kink in your photography.
Where can people see your photography?
Check out my photography on my Flickr site at: http://www.flickr.com/photos/scis/ and soon at www.awesomefarm.com.
Photography Tips and Tricks

credit
Photography isn't just about making memories, it's about art. Be artistic. Here are a few tips and tricks to help you make those photos, picture perfect.
To make those dull photos turn into works of art, consider these questions:
Decide if you want the full subject, half, or even a close up. How much background do you want, or even foreground? Exactly how close do you want that close up? What details do you want to focus on? Do you want a vertical, horizontal, or tilted photograph? What angle do you want? What's the best lighting? What background do you want to use?
1. Placing the subject of interest. Choose how much of the subject you want photographed. (Example: you want full body, half body, or face shot.) If your subject fills the frame then it's okay to center it. If you are trying to get more of the background, try placing your subject to the right or left in the viewfinder. With a horizontal (laying down), try to place them at the top for more foreground, or at the bottom for more background. And you could even tilt the camera for a more funky picture. It all depends on what part of the scenery you want visible in the picture. Maybe you want that tree to your left and your subject to the right. Or the patch of flowers in front and the mountains in back. (I find it best to take my time and take shots of each possible way and several different poses. This way I know I'll find the best photograph with the most potential.)
2. Don't center. The circle, plus sign, or brackets in the middle of your viewfinder is for focusing and isn't necessarily for centering the subject. Placing your subject in t he circle could leave you with a lot of empty and useless space on your photograph. Too much background and not enough subject. If your subject fills the frame then it is okay to center them. (Sometimes you just have to ignore the focus points and concentrate on your subjects placement in the frame instead.)
3. Camera angles. Walk around the subject, shoot from all angles and sides. This will help you to get the best lighting, background, and different aspects of the subject. You will want to find the best angle for all three. Pick a background that will not distract your viewers from the subject of interest. (I choose my backgrounds to where there's not much clutter. Sometimes I will use a plain sheet or blanket and place it behind the subject, but making sure it does not clash or blend.)
4. Reflectors. In some situations you just can't get enough light or you perhaps you just want more. To use a light reflector, place it in a position where it reflects light onto the subject without it getting in the frame. Use this if your shot is coming out too dark or there are too many shadows. On night shots that you need more than your flash can put out, place a lamp (or several) near your subject, but out of sight, and use the light reflectors to bounce from the lamps to where needed. (Some homemade light reflectors can be real cheap to make. You could use white cardboard, or if you can't find this, then simply take any piece and paint it white. For more light, place tin foil over your piece of cardboard, smooth it out, and reflect where needed.)
5. Shading. Using the same piece of cardboard as mentioned above, you can use this to block the light as well. You could make this easier by painting one side white and the other black. Or just place the piece in front of the lamp or sun to dismiss light from your subject. On most cameras you can use a sunshade for the lens, some cameras come with this, some you buy separate. This won't keep light from your subject, but it will block the light from causing a flare effect on the outcome of your photograph. The sunshade just clicks into place around your lens, and keeps the lens safe from any glaring.
6. Outside daylight. Direct sunlight is when you place the sun behind the camera, but in front of the subject. Using direct sunlight can cause shadows on the subjects face and possibly their eyes squinting. Back light is when the sun is behind the subject and in front of the camera. This will lighten the photo and cause much softer features on the subject.
7. Preventing red eye. Red eye is caused when the flash is too close to the lens. Ways to prevent this are: Attach a larger flash to your camera, t his way the flash is further from the lens. Or if buying a camera, look for one with the flash located far from the lens. Try getting closer to your subject when needing the flash. (Before I bought my camera with built in red eye correction, I had to use a photo editing program to correct these problems. I was even scanning my pictures and still having to edit when I was using my film camera that was hopeless against red eye.)